Creating a 3 x 3 Grid with SwiftUI
— SwiftUI, Grid Layout, iOS Development — 1 min read
In this tutorial, we will explore how to create a 3 x 3 grid layout using SwiftUI, a powerful framework for building user interfaces on iOS. Grid layouts provide an effective way to organize content, especially when dealing with multiple UI elements. By following the steps outlined below, you'll be able to create a visually appealing and responsive grid layout for your iOS app.
Let's get started!
Step 1: Setting up the Project
To begin, open Xcode and create a new SwiftUI project. Give it a suitable name and ensure that SwiftUI is selected as the User Interface option.
Step 2: Defining the Grid Item
To create a grid layout, we need to define a grid item that specifies the size and alignment of each cell in the grid. In our case, we want to create a 3 x 3 grid, so each cell should be equally sized.
Open the ContentView.swift file and replace the existing code with the following:
1import SwiftUI2
3struct ContentView: View {4 let columns: [GridItem] = Array(repeating: .init(.flexible()), count: 3)5
6 var body: some View {7 VStack {8 LazyVGrid(columns: columns) {9 ForEach(1...9, id: \.self) { number in10 Text("\(number)")11 .font(.largeTitle)12 .frame(maxWidth: .infinity, maxHeight: .infinity)13 .background(Color.blue)14 .foregroundColor(.white)15 }16 }17 }18 .padding()19 }20}21
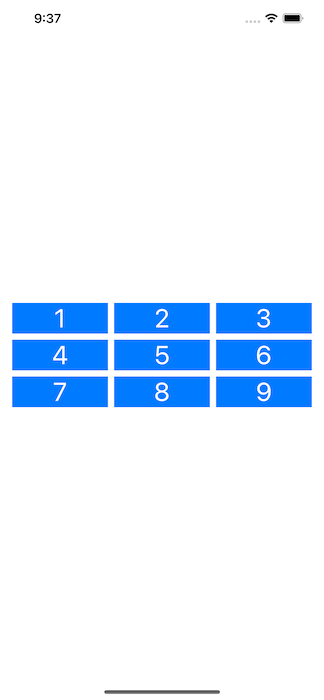
22struct ContentView_Previews: PreviewProvider {23 static var previews: some View {24 ContentView()25 }26}In the above code, we define an array of GridItem with three equally sized columns. We use a ScrollView and LazyVGrid to create a vertical grid layout, and then iterate over numbers 1 to 9 using ForEach. Each cell contains a Text view displaying the number, along with some styling.
Step 3: Running the App
Now that we have defined our grid layout, let's run the app in the simulator or on a physical device to see the result. You should observe a 3 x 3 grid with numbers inside each cell, displayed in a blue background.

Feel free to customize the content and appearance of each cell to suit your needs. You can replace the Text view with any other view or UI element of your choice.
Wrapping Up
Take what you've learned here and apply it to your own projects. Experiment with different configurations, such as varying cell sizes or incorporating images into the grid. SwiftUI provides a wide range of tools and customization options, allowing you to create stunning grid-based layouts tailored to your specific requirements.