Using Riverpod with Flutter for State Management
— Flutter, State Management, Riverpod, Provider — 2 min read
One of the things that is kind of annoying about Flutter is all the options that exist for state management. There are a lot of different takes, and too much choice can sometimes be a bad thing(decision fatigue etc.). I personally like to use something that is simple and relatively flexible. I started off using scoped_model and then moved onto provider when they were pretty much merged - now I'm using Riverpod in most of my projects. Because I like it so much I thought I'd write a quick tutorial about how to use it to manage the state of a simple counter.
Why not just keep using Provider?
Provider is pretty good, I can't argue with that. I was actually kind of afraid of using Riverpod in a production project until I actually gave it a chance. First off, both packages are authored/maintained by the same person(Remi Rousselet) so that might make your decision to migrate less stressful. To add to that, Riverpod is actually an anagram of Provider and (in my personal opinion) it is somewhat of a successor to Provider. Anyway to make things easier to read here is a list of reasons to use it over Provider:
- You can cut down on a lot of boilerplate(ex. no more
MultiProvider- just oneProviderScopewidget or no moreConsumerwidgets). - A lot of the syntax/class names are similar to Provider, everything is still called a Provider and the package still supports ChangeNotifiers if you want to use them.
- When you create a Provider it will always come with a
ProviderReferencethat you can use to access other Providers. - Providers are much easier to merge together using
ref.watch/ref.read, I wasn't a huge fan of ProxyProvider(and I don't think Remi even liked it that much himself). - StateNotifiers work without having to install additional packages(this was a bit of a pain point for me personally with Provider).
Installation
There's a couple of ways to use Riverpod but for the purposes of this tutorial I'm going to use it in conjunction with Flutter Hooks. So you'll need to add the following packages to your pubspec.yaml and run flutter pub get.
Getting Started
First you're going to want to create a class to hold state and then create a StateNotifier. So start off by creating a class called CounterState, like this:
1// To create a StateNotifier you first need to create class/model to hold the state2class CounterState {3
4 CounterState({this.value = 0});5 final int value;6
7 // This is just a simple utility method, you might want to try out freezed8 // for more complex implementations9 CounterState copyWith({int count}) {10 return CounterState(11 value: count ?? this.value12 );13 }14
15}Then create a StateNotifer, I decided to call it CounterNotifier:
1class CounterNotifier extends StateNotifier<CounterState> {2 CounterNotifier() : super(CounterState());3
4 increase() => state = state.copyWith(count: state.value + 1);5 decrease() => state = state.copyWith(count: state.value - 1);6}The StateNotifier is used to control state. It's kind of like a ChangeNotifier but the difference is it will send updates everytime you make a change to state, you don't need to manually make calls to notifyListeners. To put it more simply, everytime you make a change to state, those changes will be reflected in your Widget.
Now create a StateNotifierProvider(we'll consume this in a HookWidget later):
1// Adding .autoDispose will dispose of the provider when it is no longer needed2final counterProvider = StateNotifierProvider.autoDispose((_) => CounterNotifier());This is one of the main differences between Provider and Riverpod, your Providers are basically declared globally and can be used anywhere(you can keep them private using _ if you want to though).
Gluing it all together
So now you have:
- A class that holds the state for the counter(CounterState).
- A class that can manipulate that state and make notifications about updates(CounterNotifier).
- A StateNotifierProvider(counterProvider) to consume/use in a Widget.
Now all that's left to is create a HookWidget and connect it to everything. I'm using a HookWidget because that's the only way to use the useProvider calls:
1class CounterPage extends HookWidget {2
3 @override4 Widget build(BuildContext context) {5 final CounterState counterState = useProvider(counterProvider.state);6 final CounterNotifier counterNotifier = useProvider(counterProvider);7 return Scaffold(8 appBar: AppBar(9 title: Text('CounterPage'),10 ),11 body: Container(12 width: double.infinity,13 child: Column(14 mainAxisAlignment: MainAxisAlignment.center,15 crossAxisAlignment: CrossAxisAlignment.center,16 children: [17 Padding(18 padding: EdgeInsets.all(10),19 child: Text('Count: ${counterState.value}')20 ),21 ElevatedButton(22 child: Text('Increase'),23 onPressed: () => counterNotifier.increase(),24 ),25 ElevatedButton(26 child: Text('Decrease'),27 onPressed: () => counterNotifier.decrease(),28 )29 ],30 ),31 ),32 );33 }34
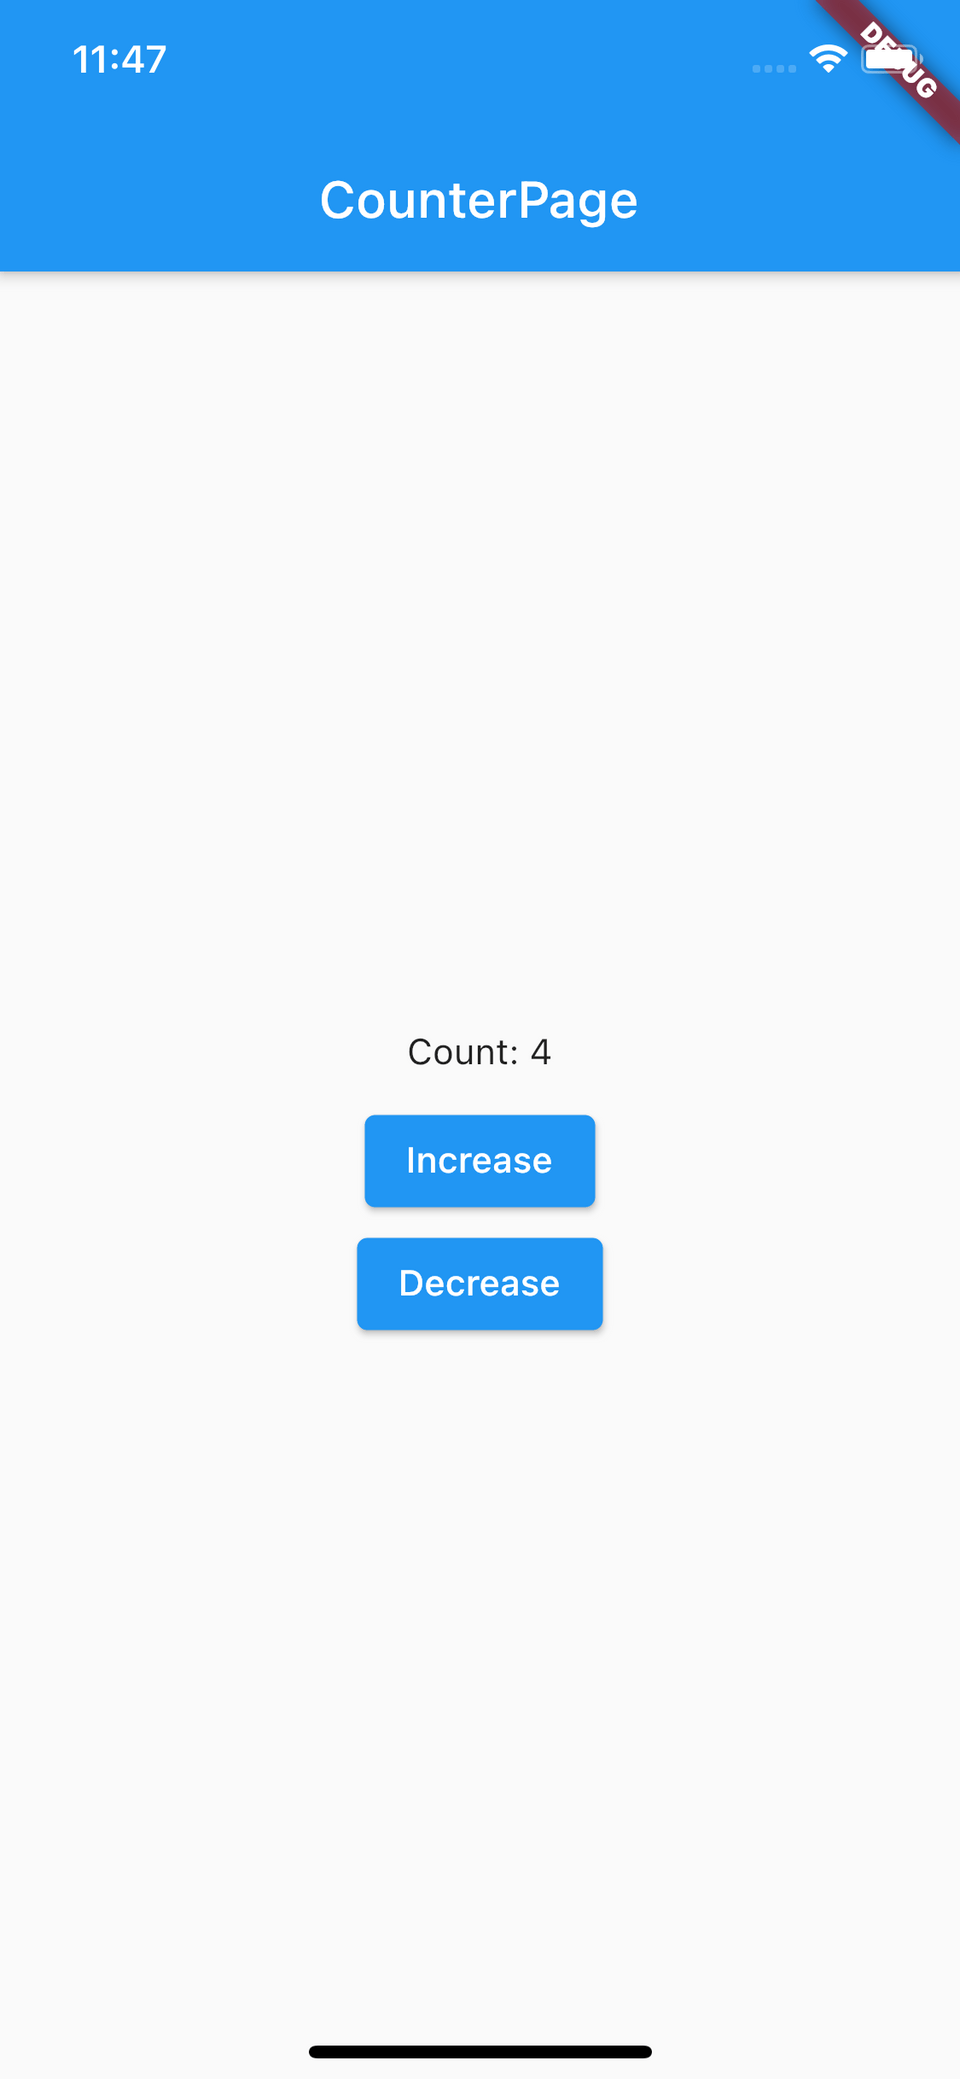
35}And that's pretty much all there is to it. The "Increase" button will increase the counter's value and the "Decrease" button will do the opposite. Here's a screenshot of the above screen for reference.

I also created Gist of everything above, so if you want to browse the full code you can check it out here.
I didn't really get to discuss ProviderReference in this post at all and that's probably one of the best parts about Riverpod so I'll probably write another tutorial in the future about merging Providers.