Creating a counter with Riverpod(v1.0.0 preview)
— Flutter, Riverpod, Tutorial — 3 min read
Earlier this year I made another post about creating a counter app with Riverpod. Right now there is a preview version out for Riverpod v1.0.0 and I'm sure that a full release is on the horizon so I decided it would be a good to time to familiarize myself with the changes - and I thought a good way to do so would be to create quick a tutorial for a counter app again.
The original tutorial
The original tutorial from earlier this year is obviously outdated but I think it still has some good discussion about Riverpod vs. Provider. If you want to read it first you can check it out here. Once v1.0.0 is no longer a preview I'm planning on adding a banner to the old post about the syntax/version being outdated.
Packages to install
Okay first of all this tutorial will be about using Riverpod with Flutter Hooks(like the last one). There's two packages that you'll need to install:
Make sure to install the versions I specified above. Also don't forget to run flutter pub get if you aren't using flutter pub add!
ProviderScope
Before writing anything else first let's make sure we wrap our app in the ProviderScope widget. I forgot to write this in the original tutorial and it's an essential step...Here's the code:
1void main() {2 runApp(3 ProviderScope(4 child: MyApp(),5 ),6 );7}Creating a class to hold state
Like in the original tutorial, first we'll create a class to hold the state for our StateNotifier. Let's call it CounterState:
1class CounterState {2 CounterState({3 this.value = 0,4 });5 final int value;6
7 /// This is just a simple utility method, for more complex classes you might want to try out 'freezed'8 CounterState copyWith({int? count}) {9 return CounterState(10 value: count ?? value,11 );12 }13}I added a copyWith method myself. As the class gets larger and more complicated this becomes less viable and I strongly recommend you try out the package freezed - created by the same author. There may be some compatibility issues with freezed and the v1.0.0 preview, I haven't had the chance to try it out yet.
Creating a StateNotifier
Next we'll create a class to consume, modify and send notifications about CounterState, we'll call it CounterNotifier:
1class CounterNotifier extends StateNotifier<CounterState> {2 CounterNotifier() : super(CounterState());3
4 void increase() => state = state.copyWith(count: state.value + 1);5 void decrease() => state = state.copyWith(count: state.value - 1);6}It has an increase and decrease method. Both of these methods make changes to the underyling CounterState instance via the copyWith method. StateNotifier is a little like a ChangeNotifier, the difference is that you don't need to call notifyListeners every time a change is made(I touched on this in the original tutorial). Instead you make modifications to the state variable and StateNotifier will automatically notify any widgets that are listening/watching.
Creating a StateNotifierProvider
Now that we've created a StateNotifier we need to create a StateNotifierProvider that will contain it:
1final counterProvider =2 StateNotifierProvider.autoDispose<CounterNotifier, CounterState>(3 (_) => CounterNotifier(),4);You can do this without autoDispose but I think it's best to use autoDispose when you are creating a provider that you will only really use in one place. If you add autoDispose the provider will dispose itself when you navigate away from that particular screen(and it will be reset when you revisit that same screen or page).
Anyway here's the complete code for counter_notifier.dart:
1import 'package:hooks_riverpod/hooks_riverpod.dart';2import 'package:riverpod_counter/counter_state.dart';3
4final counterProvider =5 StateNotifierProvider.autoDispose<CounterNotifier, CounterState>(6 (_) => CounterNotifier(),7);8
9class CounterNotifier extends StateNotifier<CounterState> {10 CounterNotifier() : super(CounterState());11
12 void increase() => state = state.copyWith(count: state.value + 1);13 void decrease() => state = state.copyWith(count: state.value - 1);14}The UI
So now we have three things after completing the above steps:
CounterState: A class that holds the state for our counter.CounterNotifier: A StateNotifier that we can use to manipulate state and send notifications to widgets about updates.counterProvider: A StateNotifierProvider for CounterNotifier that we can listen to/watch from a HookConsumerWidget.
All that we have left to do is to create a HookConsumerWidget that will listen to and make calls to CounterNotifier. This is where the syntax differs in Riverpod v1.x.x, previously we'd use a HookWidget - now we use a HookConsumerWidget. We also don't use useProvider anymore, we need to call ref.watch instead.
I decided to create a widget called CounterPage like last time, here's the code:
1class CounterPage extends HookConsumerWidget {2 @override3 Widget build(BuildContext context, WidgetRef ref) {4 final CounterState counterState = ref.watch(counterProvider);5 final CounterNotifier counterNotifier = ref.watch(counterProvider.notifier);6
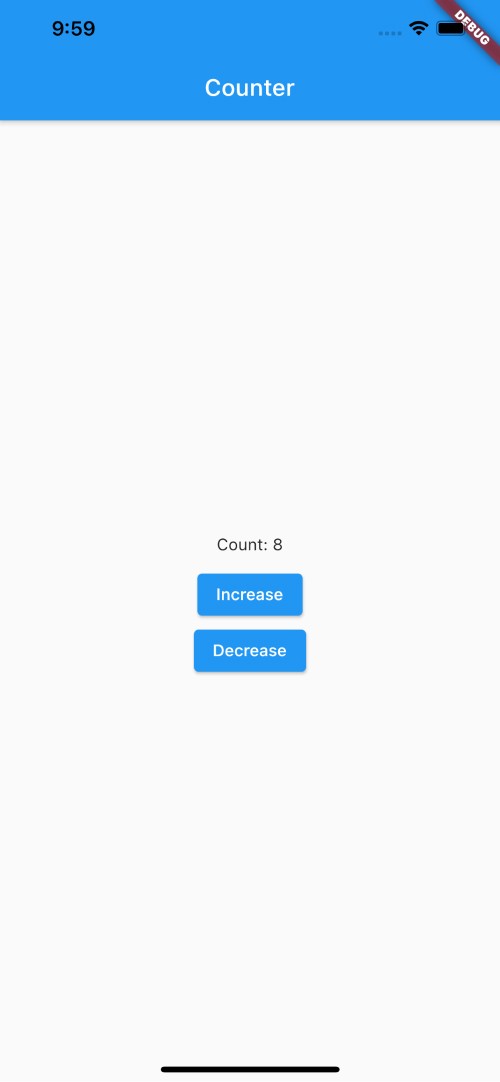
7 return Scaffold(8 appBar: AppBar(9 title: const Text('Counter'),10 ),11 body: Container(12 width: double.infinity,13 child: Column(14 mainAxisAlignment: MainAxisAlignment.center,15 crossAxisAlignment: CrossAxisAlignment.center,16 children: [17 Padding(18 padding: const EdgeInsets.all(10),19 child: Text('Count: ${counterState.value}'),20 ),21 ElevatedButton(22 onPressed: () => counterNotifier.increase(),23 child: const Text('Increase'),24 ),25 ElevatedButton(26 onPressed: () => counterNotifier.decrease(),27 child: const Text('Decrease'),28 )29 ],30 ),31 ),32 );33 }34}As you can see you use ref.watch to hook into the state(CounterState) and notifier(CounterNotifier) of counterProvider. The value for the CounterState instance is displayed in the Text widget and there are two buttons 'Increase' and 'Decrease' which will trigger their respective methods in CounterNotifier. Here's a screenshot of the UI:

I also created a GitHub repo for the code, you can browse that here. If you want to learn more about different types of providers in Riverpod you can also check out another post I made about the topic. I'm going to need to update it once v1.0.0 is formally released but it should still be mostly accurate.